In this article:
Seeing some water on your concrete floor might seem like a trivial matter. You might even dismiss the sight, thinking it will dry and not cause a problem. However, you may be surprised to learn that water-damaged concrete can be one of the most devastating problems a homeowner or business owner can face. Not only is it unsightly, but it can also cause structural issues and mold growth if not addressed properly.
In this blog, we’ll examine how significantly concrete can be damaged by water and what you can do to repair it.
Potential Causes of Water-Damaged Concrete
Several elements can cause water damage to concrete. The most frequent culprit is a lack of proper waterproofing, which can affect the structural integrity of the surrounding concrete, causing water damage to any existing concrete.
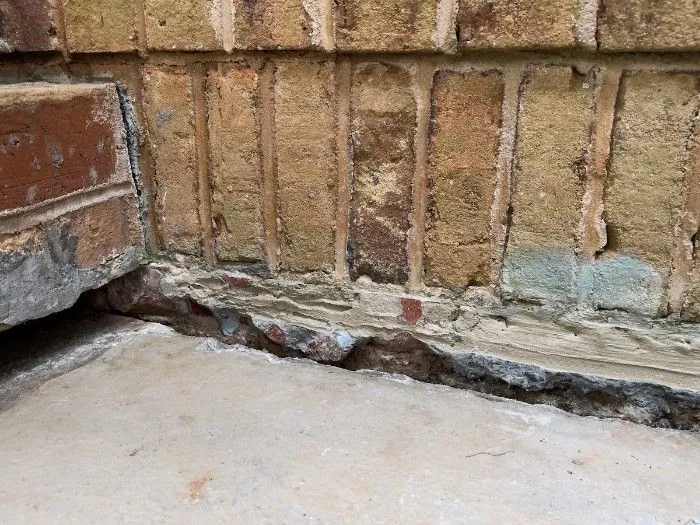
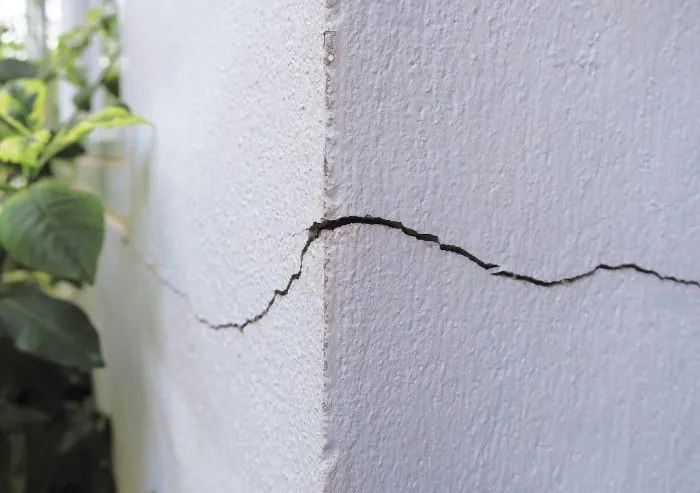
Tree root growth and seismic soil movement can contribute to water-related damage in concrete structures. Settlement cracks can lead to water entering the dense material, affecting its integrity and causing it to degrade over time.
Plumbing leaks can also cause major damage to a concrete foundation. Leaking pipes left unchecked can weaken the integrity of the surrounding concrete over time, eventually leading to a cracked and crumbling surface. Pooling water from a plumbing leak may seep into the pores of the concrete, creating further erosion over time and resulting in an uneven floor.
In addition, concrete flooring is more likely to have residual water damage due to its porous nature. This issue is common in basements and crawl spaces, which are often built from a concrete foundation.
Water damage to concrete significantly impacts the strength of the material. When too much water enters the concrete grains, it causes them to spread apart and develop cracks, thus creating more space between them. Even after the water dries, these gaps remain and are filled with air, which lessens the durability of the concrete.
It’s also common for mold spores to grow within the cement, as a dark and moist crack can provide a perfect breeding ground for spores to grow and spread.
Many homes are built on concrete foundations, and a combination of these things can lead to a dangerous living scenario. Homeowners should take preventative measures by ensuring their homes are waterproofed to reduce and prevent further water damage to concrete.

How to Identify If Cement is Wet
A visual inspection is one of the most basic ways of telling if the concrete is wet or dry. You can do this by looking at the surface of the concrete: if it’s relatively glossy and has a sheen, it’s likely wet. If it’s dry, you’ll be able to tell because it will appear duller and lighter in color.
Another way to check is by testing its firmness. Try pressing your finger into the concrete and seeing how easily it pierces through. If it’s still too firm, then it’s likely still wet.

For more accurate results, consider purchasing a moisture meter. These meters measure the amount of moisture in materials like wood and cement. Insert two pins into your material and read the percentage value displayed on the screen; anything above 10 percent indicates moisture in your material. Remember that different types of meters have different thresholds, so ensure you get one that meets your needs accordingly.
Common Issues with Drying Concrete Floors
Drying concrete floors after a flood or water damage incident can be particularly challenging due to the material’s unique properties. Here are some common issues that arise when attempting to dry concrete floors:
1. Porosity of Concrete
Concrete is a porous material, which means it can absorb and retain a significant amount of water. The water doesn’t just sit on the surface; it penetrates deep into the concrete, making it difficult to extract all the moisture quickly. This deep absorption can prolong the drying process and complicate efforts to ensure the floor is completely dry.
2. Slow Evaporation Rate
Because of its dense structure, concrete releases moisture slowly. Unlike more permeable materials such as wood or drywall, concrete does not allow water to evaporate quickly. This slow evaporation rate can lead to prolonged periods of dampness, increasing the risk of mold growth and further damage to the floor and any materials installed on top of it.
3. False Sense of Dryness
Concrete can feel dry to the touch on the surface while still retaining significant moisture within its structure. This false sense of dryness can mislead contractors and property owners into thinking the floor is ready for new coverings. However, the residual moisture can cause problems later, such as the failure of adhesives and the development of mold under the flooring.
4. Impact on Subsequent Flooring Installations
When new flooring is installed over inadequately dried concrete, several issues can arise:
- Adhesive Failure: As mentioned earlier, water-based adhesives used for installing tiles, carpets, or vinyl flooring can absorb moisture from the concrete, preventing them from curing properly. This can lead to the adhesives softening, moving, or even oozing out from the seams, causing the flooring to bubble or blister.
- Warping and Cupping: For wooden floors, lingering moisture in the concrete can cause the wood to absorb this moisture, leading to warping, cupping, or buckling. This not only ruins the appearance of the floor but also compromises its structural integrity.
- Mold and Mildew: Persistent moisture can create an ideal environment for mold and mildew to thrive underneath the flooring. This not only damages the flooring material but also poses serious health risks to the occupants.
5. Misdiagnosis of Problems
When issues arise with newly installed flooring, the initial reaction is often to blame the flooring material or the installation process. However, the root cause is frequently the undried concrete beneath. Misdiagnosing the problem can lead to repeated failures and increased costs as new flooring is installed without addressing the underlying moisture issue.
6. Challenges with Moisture Testing
Accurately testing the moisture content in concrete can be challenging. Standard moisture meters may not provide a complete picture of the moisture levels deep within the concrete. More advanced tools and techniques, such as relative humidity testing using in-situ probes, are often required to get an accurate assessment. However, these methods are not always used, leading to incorrect conclusions about the dryness of the concrete.
7. Environmental Factors
Environmental conditions such as temperature, humidity, and airflow can significantly impact the drying process. High humidity levels in the surrounding environment can slow down the evaporation of moisture from the concrete. Similarly, insufficient airflow can prevent moisture from escaping efficiently, prolonging the drying process.
How to Deal With Water-Damaged Concrete
The first step to addressing water damage to concrete is to identify the source of the problem. It could be a leaking roof, plumbing issue, or flooding from a nearby river or lake.
Once you have identified the source of the water damage, it’s important to take steps to stop it from happening again. If the source is a leaking roof, you’ll need to make repairs or replace the roof altogether. You can contact a professional plumber to find and fix the plumbing issues.
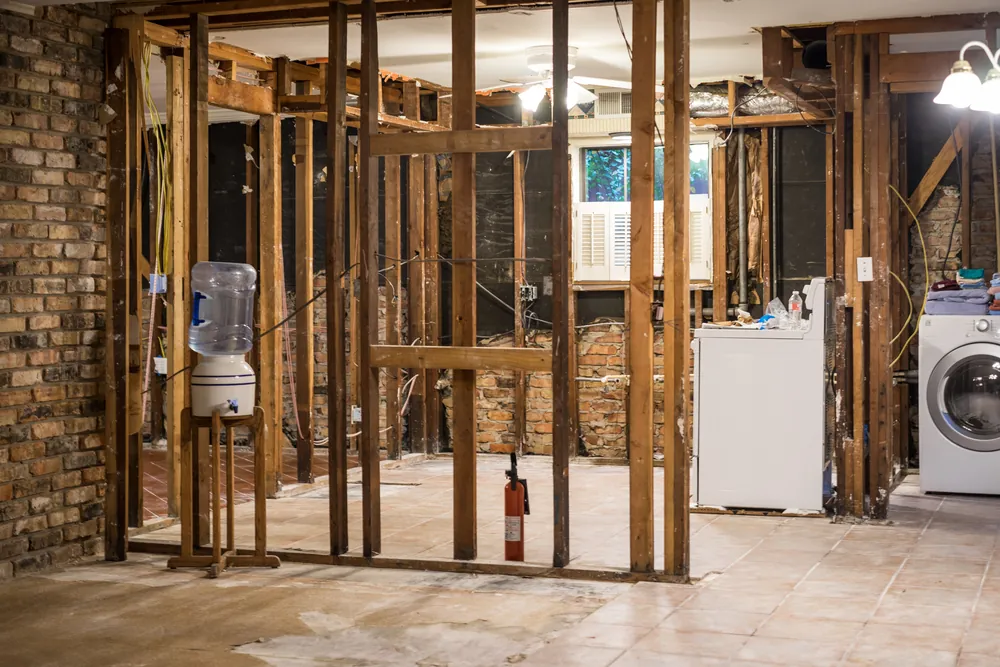
In the event of a flood caused by heavy rain or any other natural disaster, you might need to contact a property restoration company like PuroClean to remove standing water and check the moisture levels. A restoration company might also be able to inform you of any potential mold issues since water damage within concrete can lead to excessive mold growth.

How Professionals Dry Water-Damaged Concrete Floors
Successfully drying water-damaged concrete floors requires the expertise of professional restoration services. These professionals employ a combination of advanced techniques and specialized equipment to ensure thorough drying. Here are the key steps and methods used by professionals to dry water-damaged concrete floors:
1. Assessment and Inspection
Before beginning the drying process, restoration professionals conduct a thorough assessment of the affected area. This involves:
- Visual Inspection: Checking for visible signs of water damage, such as staining, discoloration, or efflorescence (white powdery deposits).
- Moisture Mapping: Using moisture meters and thermal imaging cameras to map out the extent of moisture within the concrete and surrounding materials.
- Moisture Content Testing: Employing tools like thermo-hygrometers and non-invasive moisture meters to measure the moisture content deep within the concrete.
This initial assessment helps in creating a targeted drying plan tailored to the specific conditions of the affected area.
2. Containment Chambers
Containment chambers are critical in accelerating the drying process. These chambers can be created using plastic sheeting to form boxes or bubbles taped to the floor. The purpose of containment chambers is:
- Concentration of Drying Efforts: By isolating the moist concrete within a small, controlled environment, professionals can focus drying efforts more effectively.
- Enhanced Evaporation: Containment chambers help to trap the moisture that evaporates from the concrete, maintaining a high humidity level within the chamber and speeding up the drying process.
3. Dehumidification
Dehumidifiers are essential tools in the drying process. Professionals often use Low Grain Refrigerant (LGR) dehumidifiers, which are more efficient at removing moisture from the air. The benefits of using LGR dehumidifiers include:
- Lower Air Temperature: These dehumidifiers reduce the air temperature within the containment area, which enhances their moisture removal efficiency.
- High Capacity: LGR dehumidifiers can handle large volumes of moisture, making them suitable for extensive water damage scenarios.
- Continuous Operation: They are designed to operate continuously, ensuring that moisture is consistently removed from the environment.
4. Air Movement
Proper air circulation is crucial to facilitate the drying of concrete floors. Restoration professionals use high-velocity air movers and fans to:
- Disrupt the Boundary Layer: The boundary layer is a thin layer of still air that forms on the surface of the concrete. Air movers help to break up this layer, allowing moisture to evaporate more freely.
- Enhance Evaporation: By directing airflow across the surface of the concrete, these devices accelerate the evaporation process, reducing drying time.
- Prevent Mold Growth: Consistent airflow helps to keep the environment dry, preventing the growth of mold and mildew.
5. Monitoring and Adjustments
Throughout the drying process, professionals continuously monitor the conditions and make necessary adjustments. This involves:
- Regular Moisture Readings: Using moisture meters to regularly check the moisture levels in the concrete.
- Adjusting Equipment: Modifying the placement and intensity of air movers and dehumidifiers based on the moisture readings and environmental conditions.
- Documentation: Keeping detailed records of the drying progress to ensure that the process is on track and to provide documentation for insurance purposes if needed.
6. Final Moisture Testing
Before declaring the concrete dry and ready for new flooring installation, professionals conduct final moisture tests. These tests ensure that:
- Concrete is Dry to the Core: Moisture content readings are taken at various depths within the concrete to confirm that it is uniformly dry.
- Compliance with Standards: The moisture levels meet the requirements specified by flooring manufacturers and industry standards for safe installation.
7. Consultation on Flooring Installation
After the concrete is confirmed to be dry, professionals may provide guidance on the installation of new flooring materials. This includes:
- Recommendations for Adhesives: Advising on the use of moisture-resistant or moisture-tolerant adhesives, especially for areas prone to high humidity or future water exposure.
- Moisture Barriers: Suggesting the installation of moisture barriers or underlayments to protect the new flooring from any residual moisture in the concrete.
- Proper Installation Techniques: Ensuring that the flooring installation follows industry best practices to prevent future issues related to moisture.
How to Repair Damaged Concrete
After identifying and fixing the source of water damage, you’ll need to repair the concrete itself. Depending on the severity of the damage, you may need to patch or replace the concrete. If you decide to fix the work, consider wearing personal protective equipment (PPE) since it can get messy.
Patching is usually used for minor cracks and holes, while a complete replacement of the concrete might be necessary if it’s crumbling or flaking away. You’ll also want to consider sealing your concrete after repairs to protect it from future water damage.
The first step in repairing wet concrete is to clean the area. Make sure that you remove any dirt or debris and standing water that may be present. If there are any large pieces of debris, such as stones or rocks, you should use a shovel or brush to remove them.
Once all the debris has been removed, you may use a garden hose to rinse any remaining dirt or dust particles. Allow the area time to dry completely before proceeding.
Once the area has been cleaned and dried, use a putty knife or trowel to scrape any loose concrete slabs from the affected area. Once all loose material has been removed, you may use a wire brush or grinder to smooth out any bumps or imperfections on the surface.

Mix your mortar according to manufacturer instructions and apply it liberally over the affected area using a trowel or putty knife. Work in small sections so that your mortar does not dry before you have had a chance to spread it evenly over your work surface. Then allow your mortar mix to dry and cure for 24-48 hours.
After any concrete foundation has been repaired and sealed, it’s important to inspect the area regularly for signs of any further damage. If you find any leaks or pooling of water, address them immediately before more extensive damage can occur. Regular maintenance and proper care ensure that your concrete remains safe and sound for years.
If You Are Experiencing Water Damage, Contact the PuroClean Pros
Water damage can be a devastating experience, so it’s important to have the assistance of reliable professionals to help remediate your property. At PuroClean, we understand that the ordeal can be overwhelming, so we will work with you quickly and efficiently to restore any water damage.
Our certified technicians are dedicated and experienced in providing top-notch customer service with the latest advancements in technology-based solutions and services. PuroClean goes above and beyond to ensure our clients receive excellent care, so don’t hesitate. Please contact us at (800) 775-7876 or visit our website.


