Dealing with water-damaged plywood can be a difficult task. Whether it’s caused by a leaky roof, burst pipe, or flooding, it’s important to tackle the damage quickly. This guide will provide you with practical steps and tips to repair water damaged plywood successfully. If you are dealing with significant water damage, consider seeking professional assistance for water damage restoration in Plywood or hire experts near you. Handling the issue quickly can prevent further structural damage and potential health harm.
Plywood Water Damage
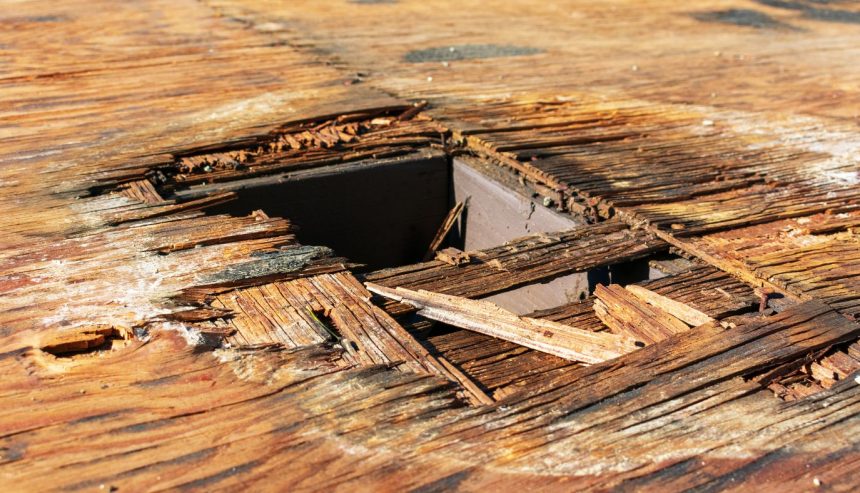
Plywood is a popular building material known for its strength and versatility. However, it is not immune to water damage. So, does plywood get damaged by water? Yes, it does. When plywood gets wet, it can swell, warp, and delaminate. These changes compromise the structural integrity of the plywood.
Immediate Actions to Take When Plywood Gets Wet
When you discover wet plywood, it’s important to act quickly to minimize damage. Here are some immediate steps you can take:
- Remove the Water Source: Identify and stop the source of water to prevent further damage.
- Protect the Area: If possible, remove furniture and other items from the area to prevent further damage.
Assessing the Extent of Damage
Before proceeding with repairs, it’s important to assess the extent of the damage. Here’s how to evaluate plywood damaged by water:
- Visual Inspection: Look for visible signs of damage such as discoloration, swelling, or peeling.
- Physical Check: Press the plywood to check for softness or sponginess, indicating that the wood has absorbed water.
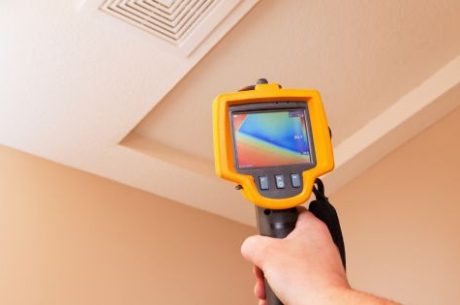
- Measure Moisture Content: Use a moisture meter to determine the moisture content in the plywood. If it’s too high, drying is essential before any repairs.
Step-by-Step Guide to Repair Water Damaged Plywood
Repairing water-damaged plywood requires a systematic approach. Follow these detailed steps to repair water damaged plywood successfully:
Step 1: Remove Damaged Sections
Start by identifying and removing any severely damaged sections of plywood. Begin by looking for visible signs of damage such as swelling, discoloration, and delamination. Use a pencil or chalk to mark the areas that need to be removed. Carefully cut out the damaged plywood using a circular saw or jigsaw. Make sure to cut beyond the visibly damaged area to include any hidden damage.
Step 2: Dry the Area Thoroughly
Before proceeding with plywood repair, make sure the area is completely dry. Moisture left behind can lead to further damage and mold growth. Use fans and dehumidifiers to speed up the drying process. In some cases, natural ventilation can also be effective. Make sure to monitor the drying process closely and check that the area is thoroughly dry before moving on to the next step.
Step 3: Treat Mold or Mildew
If you notice mold or mildew on the plywood, it’s important to treat the area with a suitable cleaner to prevent further growth. Use a commercial mold and mildew cleaner or a mixture of water and bleach. Apply the cleaner to the affected area and scrub it thoroughly with a brush. Allow the cleaner to sit for the recommended amount of time before rinsing it off with clean water.
Step 4: Apply Wood Hardener
For areas that are only slightly damaged, applying a wood hardener can help reinforce the plywood. Wood hardener penetrates the wood fibers and strengthens the damaged area, making it more resistant to further damage. Apply the wood hardener according to the manufacturer’s instructions, typically using a brush or spray bottle. Allow the hardener to dry completely before proceeding with the repair.
Step 5: Patch the Area
Once the damaged sections are removed and the area is dry and treated, it’s time to patch the area with new plywood pieces. Cut the new plywood to fit the removed sections precisely. Secure the new pieces in place using nails or screws, ensuring they are firmly attached to the existing structure. Make sure the new plywood is level with the surrounding area to maintain a smooth surface.
Step 6: Sand and Finish
After patching the area, sand the repaired section to ensure a smooth surface. Use a medium-grit sandpaper to blend the edges of the new plywood with the existing material. Sanding will help create a seamless transition between the old and new plywood. Once the area is smooth, finish it with paint or sealant to protect the plywood from future water damage. Apply the paint or sealant evenly, following the manufacturer’s instructions for drying times and additional coats.
Repairing Water Damaged Plywood Floors
Repairing water damaged plywood floors involves specific steps. Here’s how to repair water damaged plywood floor:
- Remove Floor Covering: Take off any carpet, vinyl, or tiles covering the damaged plywood.
- Assess and Remove Damaged Plywood: Inspect the plywood subfloor and remove any damaged sections.
- Dry the Subfloor: Ensure the subfloor is completely dry before installing new plywood.
- Install New Plywood: Cut and fit new plywood pieces into the removed sections. Secure them with screws or nails.
- Replace Floor Covering: Reinstall the floor covering once the repair is complete.
Preventing Future Water Damage
Preventing future water damage is crucial to maintaining the integrity of your plywood structures. Here are some tips:
- Regular Inspections: Regularly inspect areas prone to water exposure, such as roofs, plumbing, and basements.
- Seal and Protect: Use waterproof sealants and coatings on plywood surfaces to protect them from water damage.
- Quick Repairs: Tackle any leaks or water issues immediately to prevent further damage.
Contact PuroClean of Greer for Quick Water Damage Solutions
If you’re dealing with water-damaged plywood or any other type of water damage, don’t wait to take action. Contact PuroClean of Greer for fast, professional water damage solutions. Call us at (864) 523-6633 or fill out an online form on our website.


