Biohazard Cleanup Procedures for Safe Restoration Success
Did you know that exposure to untreated biohazardous materials can pose life-threatening health risks within minutes? Fast, organized action is critical when dealing with blood, bodily fluids, or infectious waste. Safeguarding your health and restoring safety takes careful planning, top-grade protective gear, and strict procedures. Discover how each step of biohazard cleanup not only protects workers but also ensures contaminated spaces return to safe, usable conditions.
Table of Contents
- Step 1: Assess Hazards And Secure The Area
- Step 2: Gather Proper Ppe And Cleanup Supplies
- Step 3: Isolate Contaminated Zones Effectively
- Step 4: Remove Biohazard Materials Safely
- Step 5: Disinfect And Deodorize All Surfaces
- Step 6: Verify Remediation And Restore Property
Quick Summary
| Key Point | Explanation |
|---|---|
| 1. Assess hazards before cleanup | Evaluate potential dangers, such as biological contamination, before starting any biohazard remediation work. |
| 2. Use appropriate personal protective equipment | Select specialized PPE, including suits, gloves, and masks, to protect against biological and chemical hazards during cleanup. |
| 3. Establish contamination zones | Create hot, warm, and cold zones to control access and prevent cross-contamination when managing biohazardous materials. |
| 4. Safely remove and dispose of hazardous materials | Collect biohazardous waste in compliant containers and follow proper procedures to ensure safe disposal and documentation. |
| 5. Verify thorough remediation of the area | Conduct inspections and document the cleanup process to ensure safety and compliance for future use of the property. |
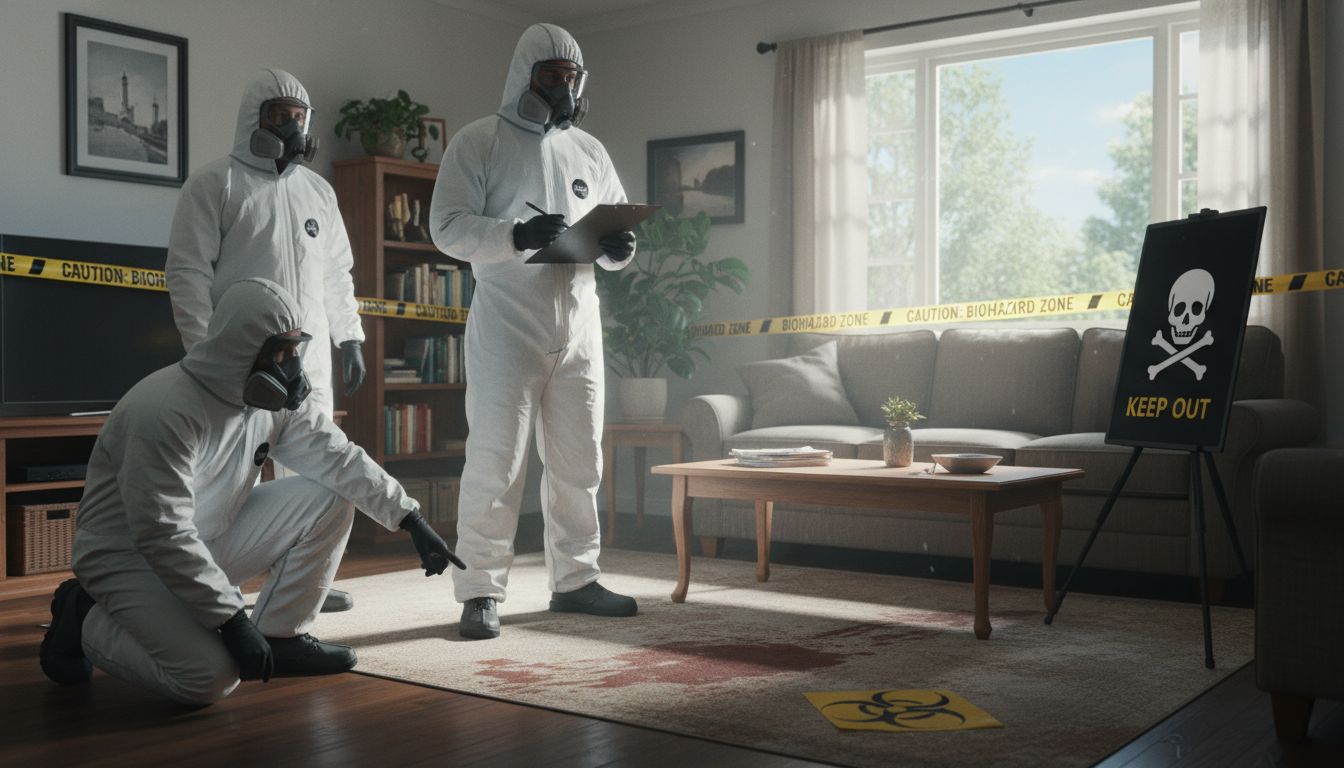
Step 1: Assess Hazards and Secure the Area
When you arrive at a potential biohazard scene, your first job is understanding and neutralizing risks. According to OSHA, professional remediation workers must thoroughly evaluate potential hazards like bloodborne pathogens and dangerous substances before starting cleanup.
Start by performing a comprehensive visual scan of the entire area. Look for visible signs of biological contamination such as blood, bodily fluids, or potentially infectious materials. Wear appropriate personal protective equipment including disposable gloves, protective eyewear, respirator masks, and full body coverings that prevent direct contact with hazardous substances.
Create clear safety zones around the contaminated space. As recommended by American Bio Management, establishing designated contamination and safety perimeters helps prevent accidental exposure. Use caution tape or physical barriers to mark boundaries and restrict unauthorized access.
Warning: Never attempt biohazard cleanup without proper training and protective gear. Professional intervention is crucial for safe remediation.
Once you have secured the area and assessed initial risks, you are ready to prepare for the detailed cleaning and decontamination process. Your next step will involve selecting appropriate disinfection protocols and specialized cleaning equipment to restore the space to safe conditions.
Step 2: Gather Proper PPE and Cleanup Supplies
Biohazard cleanup requires precision and protection. Your safety depends on selecting the right personal protective equipment and specialized cleaning supplies before entering any contaminated environment. According to research from PDQ Fire Water Damage, proper Personal Protective Equipment is essential to shield technicians from infectious agents and potential chemical hazards.
Your PPE kit should include full body coverage items like disposable protective suits with sealed seams, thick nitrile or latex gloves with extended cuffs, splash resistant safety goggles, a respirator mask rated for biological contaminants, and disposable shoe covers. Choose items rated for bloodborne pathogen protection and chemical resistance.
For cleanup supplies, you will need hospital grade disinfectants specifically designed for biohazardous materials. As American Bio Management recommends, certified cleanup services utilize proven containment methods and professional grade cleaning solutions. Stock up on specialized biohazard bags, absorbent materials, scrub brushes, enzymatic cleaners, and disposal containers that meet medical waste regulations.
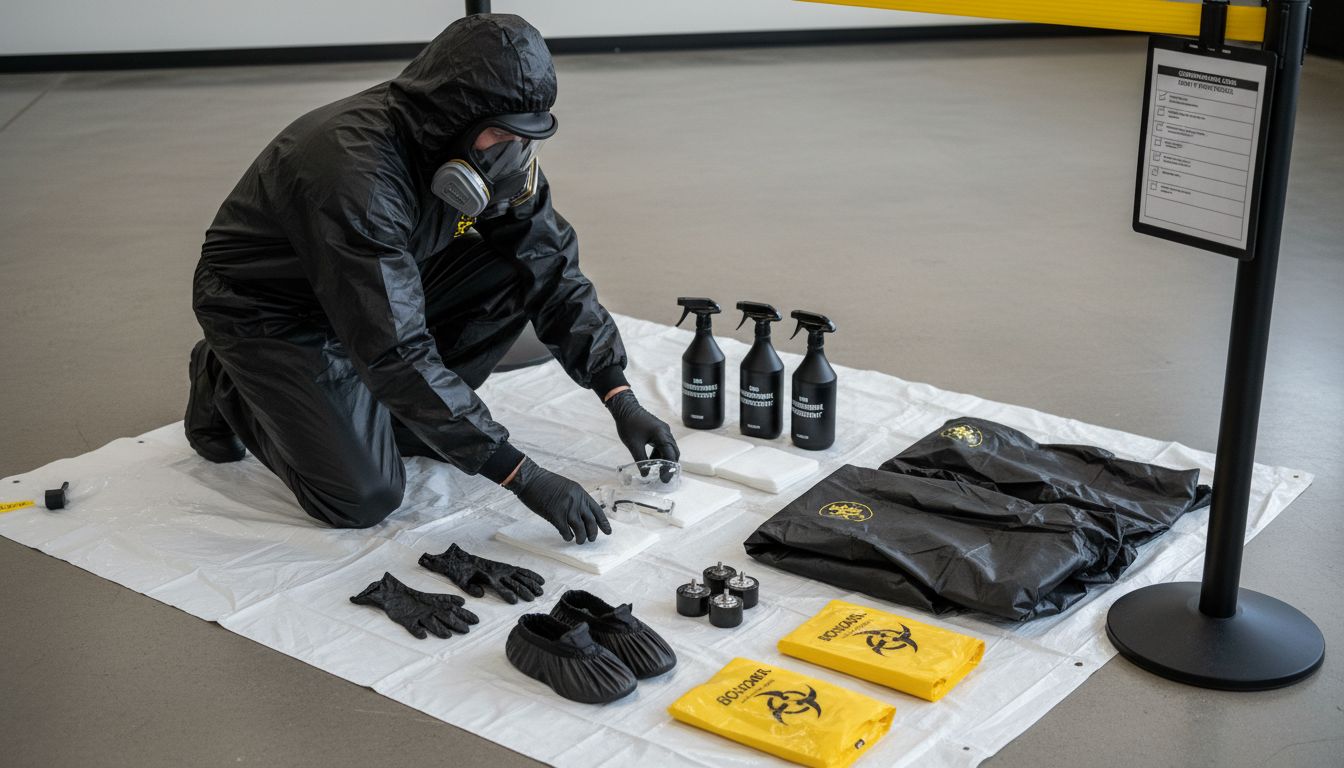
Here’s an overview of essential PPE and cleanup supplies for biohazard remediation:
| PPE Item | Purpose | Key Considerations |
|---|---|---|
| Protective Suit | Full body coverage | Disposable Sealed seams |
| Gloves | Hand protection | Nitrile or latex Extended cuffs |
| Safety Goggles | Eye protection | Splash resistant |
| Respirator Mask | Respiratory protection | Rated for biohazards |
| Shoe Covers | Footwear contamination control | Disposable |
| Disinfectants | Kill biological hazards | Hospital grade EPA registered |
| Biohazard Bags | Waste containment | Labeled Leak and puncture proof |
| Absorbent Materials | Soak up fluids | Single use only |
| Scrub Brushes | Surface cleaning | Sturdy handles |
| Disposal Containers | Safe waste removal | Meets medical waste regulations |
Pro Tip: Always purchase single use PPE and cleaning supplies. Never reuse items exposed to biological contaminants.
Once your equipment is assembled, you are prepared to move forward with the careful process of containing and cleaning the hazardous area. Your next step involves meticulously setting up your containment zone and preparing for systematic decontamination.
Step 3: Isolate Contaminated Zones Effectively
Creating a robust containment strategy is your critical mission when dealing with biohazardous environments. According to American Bio Management, establishing clear zones and engineering controls are fundamental steps to prevent cross-contamination and ensure worker safety.
Begin by identifying the primary contamination area and creating distinct zones. Use heavy plastic sheeting or specialized containment barriers to completely seal off the affected space. Mark clear boundaries with caution tape and establish a buffer zone around the contaminated area to minimize potential exposure risks. Ensure all entry and exit points are carefully controlled and monitored.
Implement a strategic zoning approach that includes three primary areas: the hot zone (directly contaminated space), warm zone (transition area for decontamination), and cold zone (safe staging area for clean equipment and personnel).
VIDEO:video_content] According to [PDQ Fire Water Damage, robust PPE and containment strategies are vital to keep contaminants fully isolated.
Warning: Never compromise your containment protocols. One small breach can lead to significant cross contamination risks.
With your zones carefully established, you are now prepared to begin the meticulous process of safe and systematic biohazard remediation. Your next step involves carefully documenting the contamination area and preparing for detailed cleaning procedures.
Step 4: Remove Biohazard Materials Safely
Removing biohazardous materials demands precision and strict adherence to safety protocols. OSHA standards require employers to follow specific guidelines for handling and disposing of hazardous waste to protect workers and the environment.
Begin by carefully collecting contaminated materials using disposable tools and placing them directly into specialized biohazard containers. These containers must be leak proof, puncture resistant, and clearly labeled with biohazard warning symbols. According to American Bio Management, safe removal involves regulated waste packaging and compliant biohazardous waste handling with meticulous documentation.
Wear your full personal protective equipment during the removal process. Use long handled tools to minimize direct contact with contaminated surfaces. Systematically work from the least contaminated areas to the most contaminated zones, preventing potential cross contamination. Double bag all materials and seal containers completely before transport.
Pro Tip: Always treat all biological materials as potentially infectious regardless of apparent contamination levels.
With all hazardous materials safely contained and documented, you are prepared for the final stages of decontamination and site restoration. Your next critical step involves thorough disinfection of the entire affected area.
Step 5: Disinfect and Deodorize All Surfaces
Biohazard cleanup demands more than just surface cleaning it requires comprehensive sanitization and odor elimination. According to American Bio Management, hospital-grade sanitization involves advanced treatments like hydroxyl and ozone technologies to ensure thorough disinfection of all contaminated surfaces.
Begin by selecting professional-grade EPA registered disinfectants specifically formulated for biological contaminants. Apply these solutions systematically using pump sprayers or specialized applicators that ensure complete surface coverage. Work methodically from least to most contaminated areas. Allow sufficient contact time for the disinfectant to effectively neutralize pathogens according to manufacturer instructions.
After initial disinfection, address lingering odors using advanced deodorization techniques. Research from PDQ Fire Water Damage highlights that effective deodorization is crucial in completely restoring the environment. Utilize industrial ozone generators or hydroxyl machines to break down odor molecules at their molecular structure.
Warning: Never mix different cleaning chemicals and always ensure proper ventilation during deodorization processes.
With surfaces thoroughly disinfected and deodorized, you have completed the critical remediation stages. Your final step involves conducting a comprehensive final inspection to confirm the area is completely restored to safe conditions.
Step 6: Verify Remediation and Restore Property
The final stage of biohazard cleanup requires meticulous verification and documentation to ensure complete restoration. According to American Bio Management, comprehensive final inspection and detailed photo documentation are essential steps for insurers and legal records.
Conduct a systematic walkthrough of the entire remediated area using specialized testing equipment. Look for any remaining traces of biological contaminants using ATP testing or fluorescent markers that reveal microscopic residues. Photograph each section systematically to create a comprehensive visual record of the restoration process. OSHA standards emphasize the importance of thorough documentation and worker training to confirm effective cleanup.
Prepare a detailed restoration report that includes before and after photographs, surface testing results, cleaning methodologies used, and a certification of complete biohazard remediation. This documentation serves as critical proof of thorough decontamination for property owners insurance providers and potential legal requirements.
Pro Tip: Use calibrated detection equipment and maintain a chain of documentation that can withstand professional and legal scrutiny.
With verification complete, you have successfully navigated the complex process of biohazard cleanup.
The property is now restored to a safe and habitable condition ready for reoccupation.
Ensure Safe and Complete Biohazard Restoration with Trusted Experts
Facing biohazard cleanup challenges means dealing with serious health risks and complex safety protocols. As the article outlines, effective remediation requires precise hazard assessment, proper use of personal protective equipment, strict containment measures, and thorough disinfection. These steps can feel overwhelming when the stakes include your familys health or your business environment. At PuroClean of Northeast Sacramento, we understand the urgency and the emotional weight of restoring safety after biohazard emergencies.
When you need professional assistance to handle contamination safely and efficiently, trust our certified technicians who follow industry-leading protocols. We offer 24/7 emergency response, use advanced cleaning technologies, and provide comprehensive documentation that helps with insurance and legal requirements. From isolating contaminated zones to final verification, we handle every step with care so you can focus on moving forward confidently.
Start your restoration journey now by visiting PuroClean of Northeast Sacramento for expert biohazard cleanup services.
Protect your property and health with professional biohazard cleanup. Contact us today at PuroClean of Northeast Sacramento and regain peace of mind knowing experts are restoring your environment safely and completely. Don’t wait until risks worsen. Act now and experience fast, compassionate, and thorough remediation.
Frequently Asked Questions
What are the initial steps for biohazard cleanup?
Begin by assessing hazards and securing the area. Perform a thorough visual scan for biological contamination and wear appropriate personal protective equipment (PPE) before cleaning.
How do I gather the right PPE for biohazard remediation?
Collect essential PPE including fully sealed protective suits, nitrile gloves, splash-resistant goggles, and respirator masks rated for biological hazards. Ensure all items are single-use and suitable for handling infectious materials.
What methods should I use to isolate contamination zones?
Create distinct contamination zones using heavy plastic sheeting and caution tape to prevent cross-contamination. Designate hot, warm, and cold zones to control access and maintain safety during the cleanup process.
How should I remove biohazardous materials safely?
Carefully place contaminated materials in leak-proof biohazard containers using disposable tools, ensuring all bags are double-bagged and sealed before removal. Systematically work from least to most contaminated areas to prevent cross-contamination.
What steps are involved in disinfecting and deodorizing surfaces?
Use EPA-registered hospital-grade disinfectants, applying them thoroughly to all surfaces and allowing adequate contact time. Follow up with deodorization techniques like industrial ozone generators to eliminate lingering odors.
How can I verify that the biohazard cleanup is complete?
Conduct a thorough inspection of the area using specialized testing methods to check for remaining contaminants, and document the process with before and after photos. This detailed report acts as proof of successful remediation for property owners.
Recommended
Chemical Exposure And How it Affects Georgia Residents
Guide to Biohazard Cleanup Alexandria VA for Owners
Crime Scene Cleanup – PuroClean of Walnut Creek
Top 5 Biohazard Cleanup Scenarios Alexandria That Need Professional Cleanup
